How to Put On Compression Socks: 6 Easy Methods (Even With Arthritis)
Why compression socks are so hard to put on
Compression socks are built to squeeze. They feel tight on purpose, with the most pressure around the ankle and less pressure higher up the leg. That snug ankle is exactly the part you have to stretch over your heel, the widest part of your foot.
A few other things make the job harder:
- Swelling. Legs tend to swell as the day goes on, so a sock that slides on easily in the morning can fight you by lunchtime.
- Damp or freshly moisturized skin. The fabric grabs your skin instead of gliding over it.
- Reach and grip. Pulling a tight sock takes hand strength and the ability to bend toward your feet. In a study of adults over 65, reaching the front of the foot and hand grip strength decided who could get their stockings on.
Each of these problems has a simple fix. Pick the method below that matches yours.
Before you start: the easy way to put on compression socks begins in the morning
The easiest time to put on compression socks is first thing in the morning, before your legs have a chance to swell. MedlinePlus even suggests putting them on before you get out of bed, since swelling is lowest early in the day.
- Make sure your skin is completely dry. If you shower in the morning, towel off well and wait a few minutes.
- Skip lotion right before. Moisturizing is good for your skin, but do it in the evening, or let the lotion soak in completely before you start.
- Take off rings and bracelets and check for rough fingernails. Both can snag the fabric or scratch your skin.
- Sit down. A sturdy chair or the edge of your bed beats balancing on one leg.
Once the sock is on, the fabric should lie smooth, with no wrinkles or bunching. Never fold or roll the top down. A rolled band adds extra pressure, like a tight rubber band around your leg. A knee-high sock should end about two fingers below the bend of your knee.
Method 1: the inside-out heel pocket
This is the classic method that hospital nurses teach, and it works for most regular pull-on compression socks.
- Put your hand inside the sock and grab the heel.
- Pull the sock inside out, stopping at the heel. You now have a foot pocket with the leg part folded back over it.
- Slide your foot into the pocket as far as it will go.
- Line up your heel with the heel of the sock.
- Grab the folded edge and ease the fabric over your heel and ankle, a few inches at a time. Don't yank on the top band.
- Keep working the fabric up your calf in small, even pulls without twisting it.
- Smooth out any wrinkles with flat hands.
If you overstretch one section, push the sock back down to the ankle and work it up again more evenly.
Methods 2 and 3: rubber gloves and cornstarch for a better grip
Method 2: wear rubber gloves
Plain rubber dishwashing gloves are one of the most recommended tricks. They let you grip the fabric without pinching and smooth it out with flat palms. They also keep fingernails from snagging the knit. If you're allergic to latex, use nitrile gloves. Special donning gloves exist, but household gloves do the same job for many people.
Method 3: a light dusting of cornstarch or powder
If your skin tends to be a little damp, a thin layer of cornstarch or baby powder on your foot and ankle helps the fabric slide. A little goes a long way. Gloves and powder work with any other method in this guide.
Method 4: use a compression sock aid (donning aid)
A compression sock aid, also called a donning aid or stocking donner, holds the sock open so you can step into it. In a study of 40 adults over 65 with long-term vein problems, the share who could fully put on their stockings rose from 73% without devices to 93% with donning devices.
Frame-style aids
A metal or plastic frame holds the sock stretched open. You set it on the floor, step in, then lift the frame by its handles to draw the sock up your leg. Frames help most if you can't bend far, because the handles do the reaching.
Slide sleeves and foot slips
A slippery fabric sleeve goes over your foot first. The compression sock glides over it, and then you pull the sleeve out. Sleeves are small and handy for travel, but you still need to reach your feet.
Check that any aid you buy is made for compression socks. Aids for regular socks may not hold the tighter fabric open.
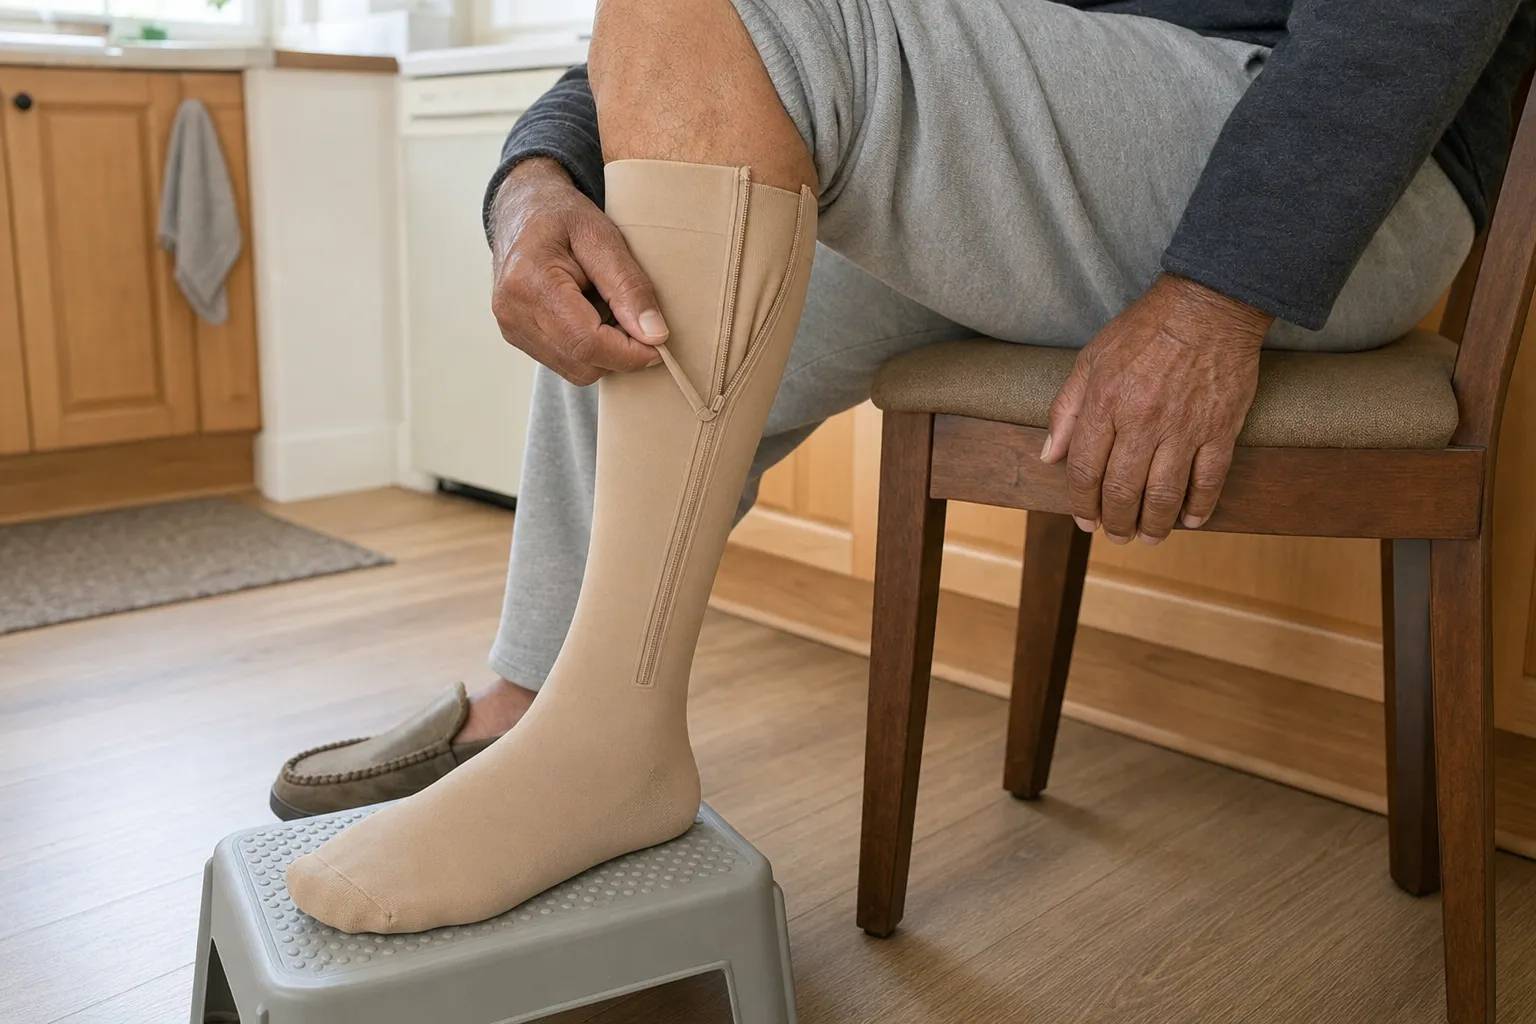
Method 5: zipper compression socks
Side-zipper compression socks skip the hardest step completely. Because the sock opens along its length, you never have to stretch the tight ankle over your heel.
- Unzip the sock all the way to the bottom.
- Sit in a sturdy chair with your foot flat on the floor or resting on a low stool.
- Slide your toes into the foot of the sock and settle your heel into the heel pocket.
- Turn the sock so the zipper runs straight up the side of your leg, not twisted toward the front or back.
- Hold the two edges together at the ankle with one hand. With the other hand, start the zipper and pull it up in short, steady moves. Keep the soft fabric guard lying flat behind the teeth, between the zipper and your skin.
- At the top, check that the band sits about two fingers below the bend of your knee, and smooth out any wrinkles.
Can't bend far? Prop your foot on a footstool or the bottom stair so your ankle comes closer to your hands. Once the zipper is past your ankle, sit up and finish from a more comfortable position. A key ring or ribbon loop threaded through the zipper tab gives stiff fingers something bigger to hold.
If the zipper is hard to close at the ankle, don't force it. The size may be too small, or your legs may have already swollen. Measure your calf at its widest point in the morning and check our compression sock size guide. If you're between sizes, size up.
Our closed-toe zip-up compression socks and open-toe zip-up compression socks are knee-high, graduated 15-20 mmHg, with a full-length side zipper and a soft fabric guard behind the teeth. If you're weighing the options, our zipper vs regular compression socks comparison walks through the tradeoffs.
How to put on compression socks for elderly people, with arthritis or by yourself
With arthritis, stiff hips or weak hands, put the effort into the setup instead of your fingers.
- Use your palms, not your fingertips. Rubber gloves let you push the fabric up with flat hands instead of pinching it.
- Bring your foot up to you. A footstool, or crossing your ankle over the opposite knee if your hips allow it, means less bending.
- Match the tool to the problem. If you can't reach your feet, a frame-style aid with long handles helps. If your grip is weak, a zipper or a slide sleeve takes most of the pulling out of the job.
- Ask about an occupational therapist. They can teach techniques and suggest aids that suit your hands and range of motion.
Method 6: let a helper do the pulling
If a family member or caregiver helps, sit with your leg out straight and your foot on their knee. They can use the heel-pocket method in rubber gloves, working the fabric up in small sections. Tell them right away if anything pinches.
Cleveland Clinic notes that elastic bandages and hook-and-loop wraps may be easier for people who have trouble putting on socks, so ask your doctor if that suits you better. For more ideas, see our guides to compression socks for seniors and compression socks for arthritis.
Check with your doctor before wearing compression socks if you have peripheral arterial disease, poor circulation in the legs, heart failure, or reduced feeling in your feet. If you can't feel your feet well, you may not notice when a sock is too tight.
How to take off compression socks
Take your socks off at bedtime unless your doctor has told you otherwise. Here's the gentle way to do it:
- Sit down.
- For pull-on socks, hook your gloved hands inside the top band and fold it down over itself.
- Peel the sock down your leg so it turns inside out as it goes.
- When it reaches your heel, push it over the heel and off your foot.
With zipper socks, unzip from the top down and lift your foot out. A long-handled dressing stick can push a sock off your heel if you can't bend far.
Then check your skin. Light lines from the knit that fade soon are normal. Call your doctor if you notice pain, numbness, tingling, skin color changes or sores. To learn how long to keep them on each day, read our guide on whether you can sleep in compression socks.
How to put on zipper compression socks: quick steps
- Unzip fully. Open the zipper all the way to the bottom so the sock lies open.
- Sit down. Sit in a sturdy chair and rest your foot flat on the floor or on a low stool.
- Place your heel. Slide your toes into the foot of the sock and settle your heel into the heel pocket.
- Line up the zipper. Turn the sock so the zipper runs straight up the side of your leg without twisting.
- Zip from the ankle up. Hold the edges together at the ankle, keep the fabric guard flat behind the teeth, and pull the zipper up in short, steady moves.
- Check the fit. Make sure the top sits about two fingers below the bend of your knee, then smooth out any wrinkles.